|
|
 18-01-2009, 05:34 PM
|
#61 | |
|
Arofanatic
 Join Date: Nov 2006
Posts: 167
|
Quote:
|
|

|

|
|
18-01-2009, 05:38 PM
|
#62 |
|
Arofanatic
 Join Date: Nov 2005
Posts: 269
|
hi bro JadeIceGreen, in your 1st post "The most common iwagumi style is called sanzon iwagumi. Sanzon means "three pillar" in Japanese and these aquascapes make use of three rocks, with two smaller rocks and one larger rock. According to the Japanese Architecture and Art Net Users System , this term was first used in the 11th century Japanese garden treatise "Sakuteiki." The grouping of stones comes from Buddhism; the central stone is called the chuusonskei (or the big Buddha) and the smaller flanking stones are called kyoujiseki (or attendant stones). The kyoujiseki are often tilted or pointed towards the chuusonskei as if bowing down to it. The chuusonskei is almost always positioned according to the Golden Rule."
Shouldn't your 2 side stone be slanted inward instead of outward? |
|
|
|
|
18-01-2009, 05:52 PM
|
#63 | ||
|
Guest
Posts: n/a
|
Quote:
And this is my first Iwagumi scape, so we are all here to learn from each other.  Quote:
I decided not to follow that because I do not have rocks that looks nice if I scape it that way. Secondly and more importantly, I wanted to create some tension and space in a pretty small tank. I figured out that if both supporting rocks were to bow to the biggest rock, the scape will look small as our perception of the scape will be framed by the direction the rocks point to. However if the rocks pointed outwards, then our perception of the scape will be framed by the tank walls instead. And very often, perception is reality. That is why when scaping with hardscape using a small tank, it is very effective to point your hardscape outwards to create this sense of space. In a big tank however, you scape your hardscape downwards or inwards to create a sense of intmacy and a focal point while the rest of the plants support it. |
||
|
|
|
18-01-2009, 06:00 PM
|
#64 | |
|
Arofanatic
Join Date: Nov 2006
Posts: 167
|
Quote:
own creativeness and preference also play a big part besides golden rule of scaping,eagerly awaiting ur project completion
|
|
|
|
|
|
18-01-2009, 08:43 PM
|
#65 |
|
Guest
Posts: n/a
|
You might have chosen 1 rock with a fatter base to help "widen" the hardscape. Also I personally would have also gone for HC "cuba" since the tank is small. It will look great with glosso if it is at least around 2 feet and bigger.
But that's just me. Take a shot when its all done. |
|
|
|
18-01-2009, 10:06 PM
|
#66 | ||
|
Guest
Posts: n/a
|
Quote:
Quote:
|
||
|
|
|
18-01-2009, 11:49 PM
|
#67 |
|
Guest
Posts: n/a
|
Update again!
More photos, less talk! Planting is done! Foreground filled with Glosso, and the background a mix of Eleocharis parvula and Eleocharis Vivipar.  You can see the three layers of substrate. 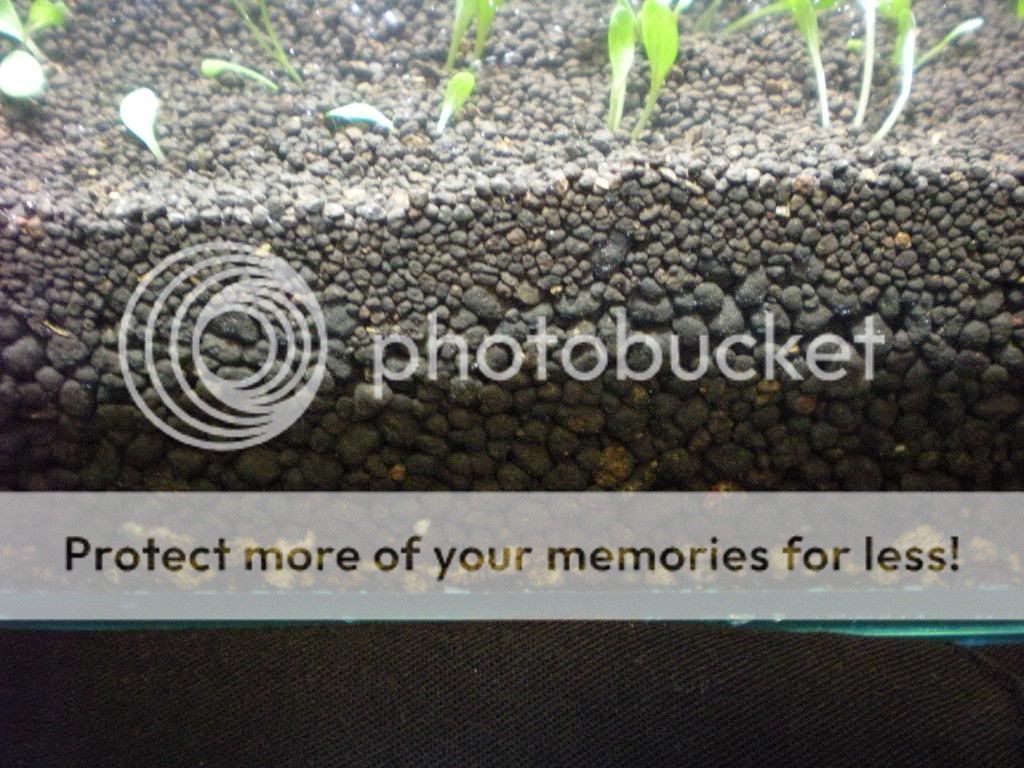 Water is being filled out slowly through an air tube, all 20 litres. 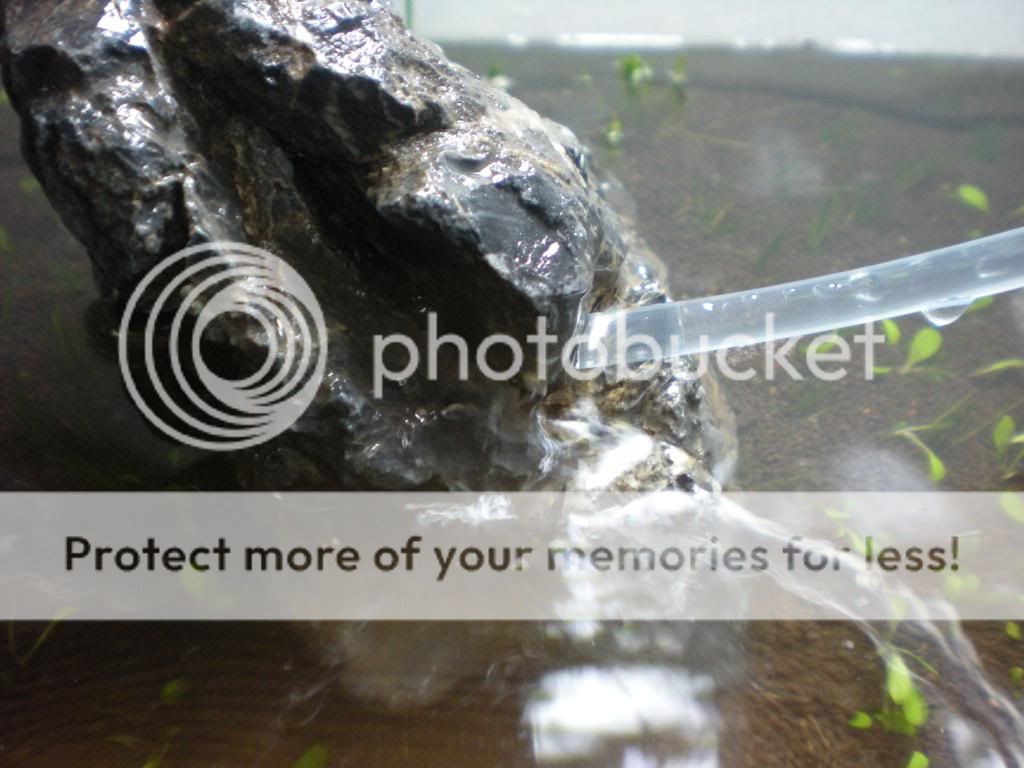 This was shot immediately after the water was filled up, the filter is not connected to the tank yet. This proves that ADA substrate does not cause your water to turn muddy, as alot of people have been saying, I guess it all depends on your care when first filling your tank with water. 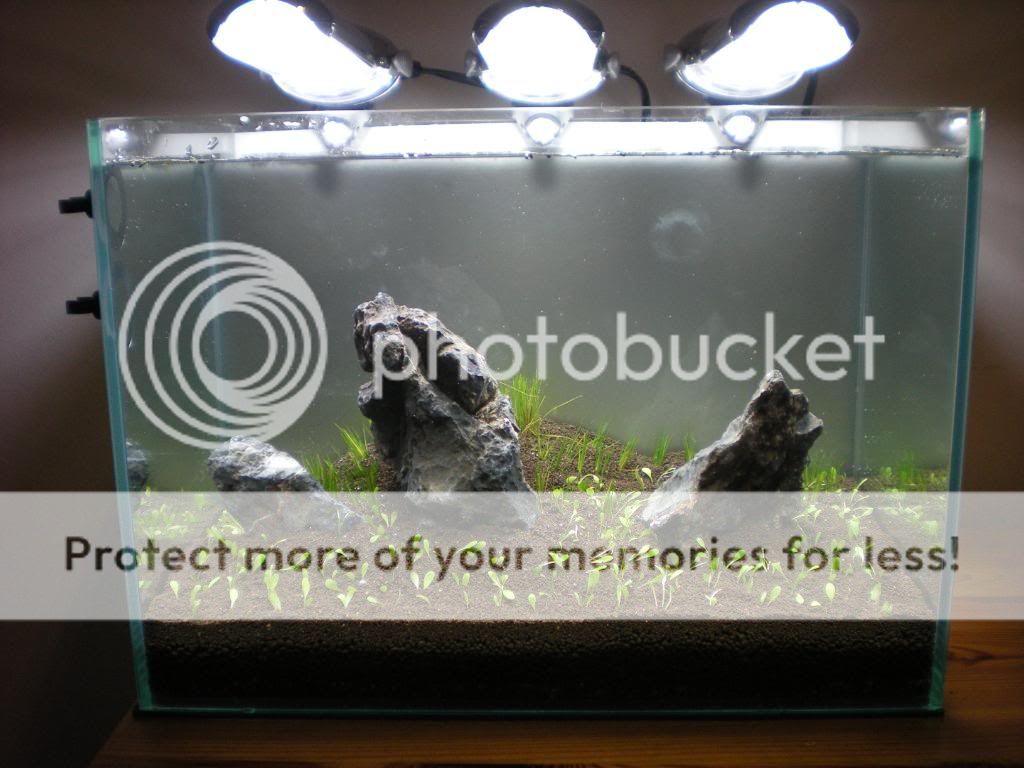  Now the hard part, gonna see how it grows. I will update you guys, starting tomorrow morning, on water parameters that I will be taking on a daily basis. |
|
|
|
19-01-2009, 09:51 AM
|
#68 |
|
Endangered Dragon
 Join Date: Sep 2000
Posts: 9,833
|
looks good. now just have to wait for the plants to do their work... by growing

|
|
|
|
|
19-01-2009, 08:54 PM
|
#69 | |
|
Guest
Posts: n/a
|
Quote:
 *crossing fingers!* 
|
|
|
|
|
19-01-2009, 08:56 PM
|
#70 |
|
Guest
Posts: n/a
|
Another update!
Alright, this update is all about what I've been doing as daily maintenance for the last three days since planting was completed, my fert regime and more equipment details so if you are interested, read on! My daily fert regime consist of ADA Green Brightly Step 1 and ADA Brightly K. I have used these liquid ferts before and I swear by them, in my opinion, ADA's ferts are the best of all ADA products. Green Brightly Step 1 is for a scape from it infancy to 3 months of age. Its main purpose is to provide in sufficient quantity, trace elements, in a balanced manner to promote and encourage young plants to grow. Brightly K mainly provides potassium that is used in conjunction with Green Brightly Step 1. It also serves a secondary function as a neutralizer for chlorine but I'm not sure if it does also for chloramine so I am still using seachem prime as my primary water conditioner. Both ferts are dosed at 1ml daily. 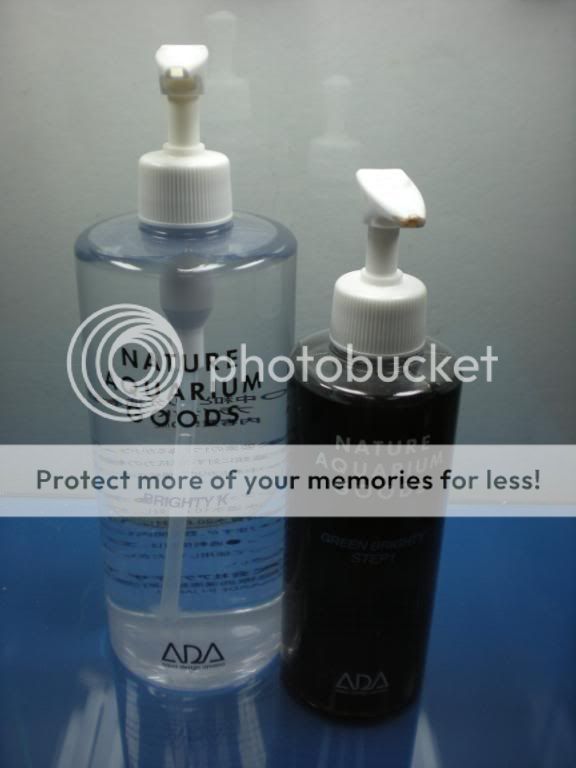 My chiller runs about 8-9 hours a day and I have set it at the 180 watts setting. Temperature hovers between 24.3 and 25.8 and my electrical bill will be about 10 to 12 dollars a month extra. Ironically, if my tank was double in size, I may actually use less electricity due to the fact that 20 litres, being of such a small amount of water, picks up heat rapidly when the chiller is on standby.  Inlet and outlet pipes are placed in such a way that forms an effective current around the whole tank eliminating dead spots. CO2 is dispensed via a glass diffuser and is placed under the outlet to ride the water current at its strongest.  Another spot to place a CO2 diffuser is directly across the outlet on the other side of the tank. I could not use this spot as my drop checker is placed nearby and in a small tank like mine, its not recommended to place your CO2 diffuser on the same side of your drop checker as the readings will not be accurate. For the first few weeks, I will be overdosing CO2 as there are no fauna yet. Current dosage is 1.5 bubbles per second. 
|
|
|
 |
|
| Currently Active Users Viewing This Thread: 2 (0 members and 2 guests) | |
|
|


 Linear Mode

